
Installing Bathroom Vanity

Installing a bathroom vanity requires securing the cabinet to wall studs, leveling the base, and properly preparing the surrounding substrate for tile or stone backsplashes. For homeowners in Franklin, TN, Craftsman Tile and Stone handles the custom tile surrounds, flooring, and waterproofing that go into a complete vanity area update. We help local residents plan the layout, select durable materials, and ensure the wet-area prep is done correctly before the final finish material goes on the wall. A successful installation depends on precise measurements, plumbing alignment, and a perfectly flat surface to prevent tile lippage.
Understanding the Vanity Installation Process
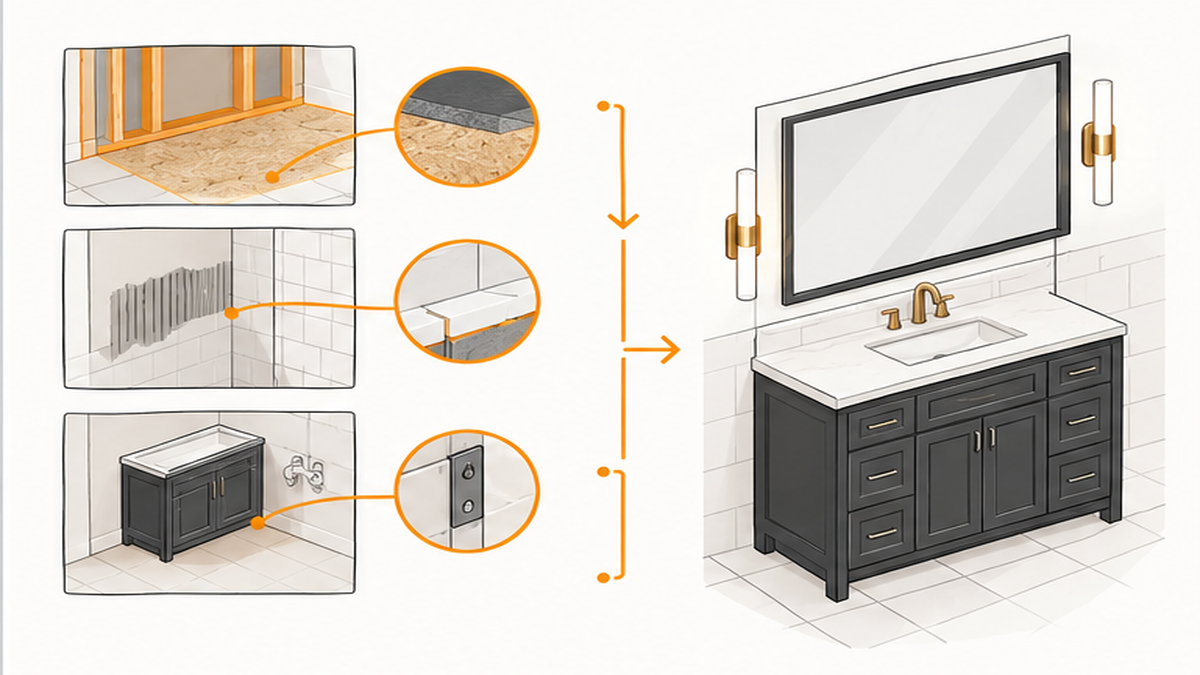
Setting a new vanity is more complex than simply moving a cabinet into a room. The floor and wall conditions dictate how well the final piece sits and how the tile aligns around it. If the subfloor has deflection or the drywall is uneven, the vanity will not sit flush, which complicates the backsplash installation.
When planning a bathroom design, the vanity often serves as the focal point, meaning the tile work surrounding it must be precise. We start by checking the substrate for flatness. If the floor is out of level, we apply a self-leveling underlayment or adjust the substrate board so the cabinet rests evenly.
| Prep Factor | Why It Matters |
|---|---|
| Substrate Flatness | Prevents the cabinet from rocking and ensures tile backsplashes sit flush against the wall. |
| Plumbing Rough-in | Must align perfectly with the vanity cabinet design before any tile is set. |
| Moisture Protection | Protects the wall behind the sink from daily splashing and long-term water damage. |
Proper sequence is critical. The rough plumbing must be positioned correctly for the specific vanity model. Once the mechanicals are in place, the drywall is repaired, and the floor tile is set and cured. Only then should the vanity be anchored to the studs, allowing the custom tile backsplash to be installed seamlessly above the countertop.
Key Decisions Before Demolition

Before tearing out the old cabinet, you have to decide how the new vanity integrates with your existing bathroom footprint. Changing the size or style of the vanity usually means patching the floor tile or reworking the plumbing lines.
Consider these key layout and material factors:
- Flooring sequence: Setting tile under the entire vanity provides a cleaner look, protects the subfloor from water damage, and makes it easier to change the cabinet style in the future.
- Backsplash height: Decide if you want a standard four-inch stone lip or a full custom tile wall that extends to the ceiling for a more dramatic impact.
- Material selection: Choose finish materials that handle moisture well. Porcelain tile is dense and absorbs less water, making it ideal for busy family bathrooms.
If you are budgeting for a larger project, reviewing a bathroom remodel contractor cost guide can help you understand how these material choices and layout changes impact the overall scope. Custom niches, complex tile patterns, and extensive substrate repairs will add to the timeline, so it helps to finalize these decisions before the demolition phase begins.
Common Vanity and Tile Mistakes
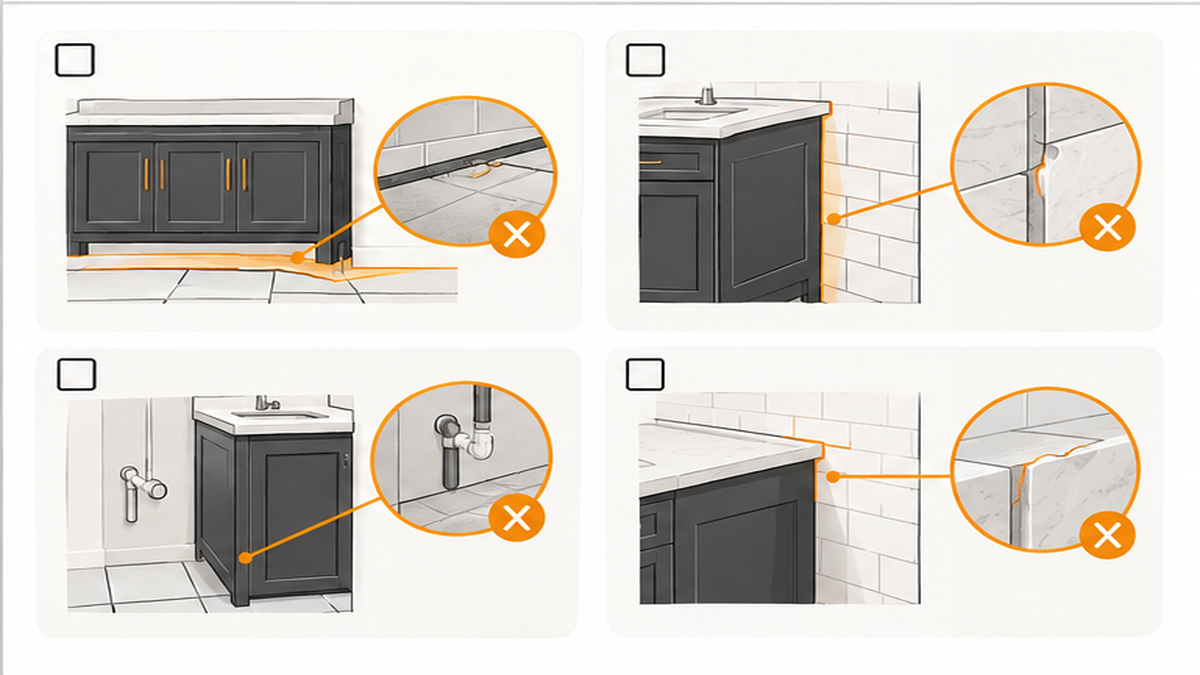
One of the most frequent issues we see in Williamson County homes is installing a vanity over an uneven floor without addressing the substrate first. If the floor flexes when you walk on it, the grout joints around the vanity base will eventually crack.
Here are other common errors to avoid:
- Skipping moisture protection: Failing to properly caulk and waterproof the area behind the sink allows daily splashes to seep into the drywall, leading to hidden mold.
- Trapping appliances or doors: Installing a deeper vanity without checking door swings or toilet clearances can make the bathroom feel cramped and violate building codes.
- Ignoring tile layout: If the tile setter does not plan the layout around the vanity height, you may end up with awkward sliver cuts right where the countertop meets the wall.
Another major mistake is cutting structural supports out of the vanity cabinet to force it over misaligned plumbing pipes. This ruins the integrity of the furniture. Proper planning ensures the plumbing rough-in matches the cabinet specifications before the tile goes on the wall.
When to Call a Tile Craftsman
You should call a professional when your vanity upgrade involves moving plumbing, repairing subfloor rot, or installing complex custom tile surrounds. If you pull out the old cabinet and find water damage, soft spots in the floor, or mold on the drywall, stop the project immediately.
A licensed plumber needs to handle any pipe relocations to ensure they meet code and drain properly. Meanwhile, a dedicated tile craftsman should manage the substrate prep, leveling, and waterproofing. For a complete bathroom remodel, having a clear sequence of trades ensures the framing, plumbing, and tile work happen in the correct order without damaging finished surfaces.
We often step in when homeowners realize their subfloor requires structural reinforcement before large-format tile can be installed. Oleksiy personally handles the tile layout, setting material application, and final grouting to ensure the finish material is perfectly aligned with your new vanity. Hiring a professional guarantees that the wet-area prep meets proper standards, protecting your home from future leaks and costly rework.
Related Services and Guides
Ready to Update Your Bathroom?
Frequently Asked Questions
Do bathroom vanities need to be screwed to the wall?
How long does a bathroom tile remodel take?
How do I request a bathroom remodel estimate?
Maintenance Tips for Vanity Areas
Keeping your vanity area looking pristine requires simple, consistent care. Wipe down your tile backsplash and stone countertops with a pH-neutral cleaner to protect the finish and the grout lines. Avoid harsh acidic chemicals, which can etch natural stone and degrade caulking over time.
Inspect the silicone seal where the vanity top meets the tile wall once a year. If the caulking starts to peel, crack, or discolor, remove the old bead completely and apply fresh 100% silicone to maintain a watertight barrier. This simple step prevents water from running down the back of the cabinet and damaging the drywall.
Understanding the maintenance required for different materials is an important part of bathroom and remodeling planning. Highly porous natural stones require periodic sealing, while glazed porcelain simply needs regular wiping. If you are also updating the wall behind the sink, our backsplash tile installation cost guide explains how material choices affect long-term durability and upkeep. Finally, ensure your bathroom has adequate ventilation; running the exhaust fan during and after showers keeps humidity low, which protects your wood vanity and prevents mildew from forming on the grout joints.