
Understanding the Bathroom Tile Installation Process
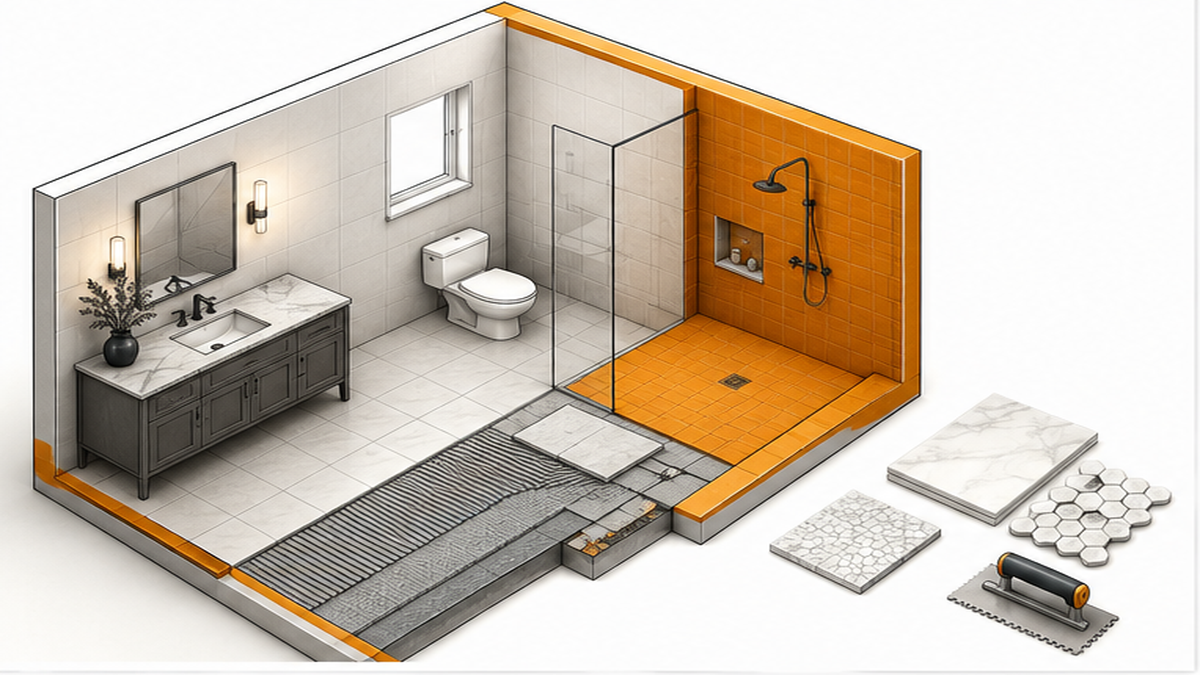
A proper bathroom tile installation process starts with completely clearing the space, verifying the substrate for structural integrity, applying a TCNA-standard waterproofing membrane in wet areas, and setting the tile with precise layout planning. For homeowners in Franklin, TN, knowing these steps helps you spot the difference between a quick cosmetic cover-up and a lasting custom bathroom remodel. We handle everything from demo and surface prep to the final grout joint. If you are dealing with a leaking shower or squishy floors, understanding the repair path early—especially the waterproofing and shower pan details—gives you confidence before booking an estimate.
How Our Tile Floor and Shower Installation Works
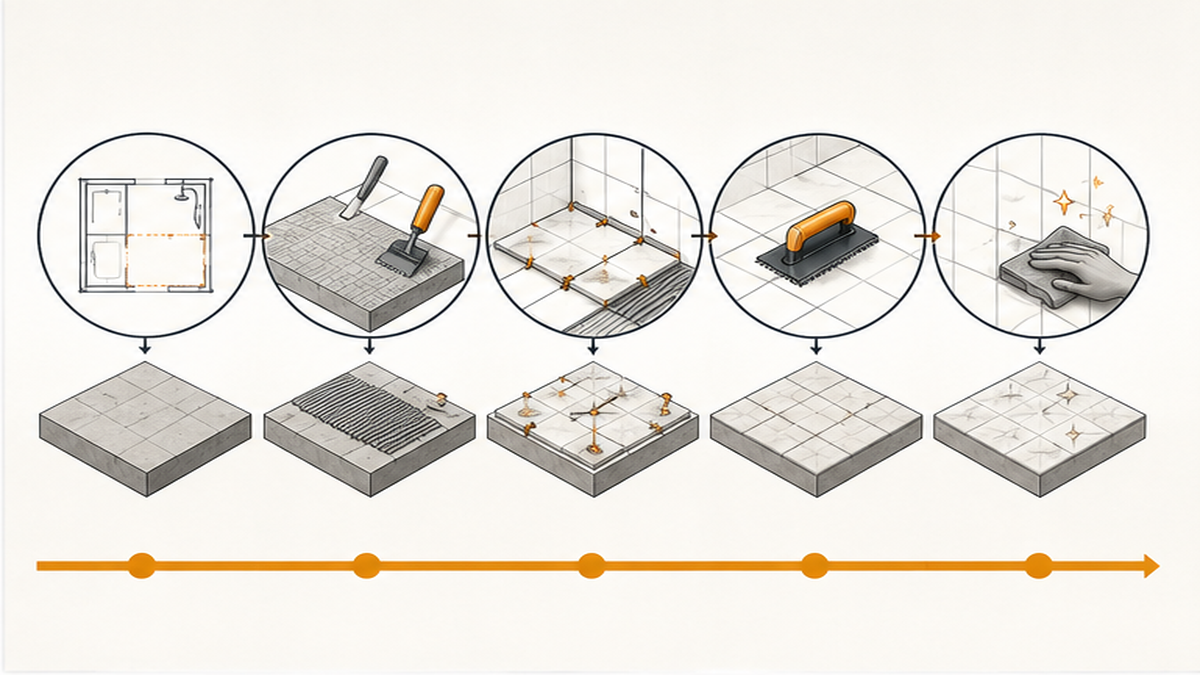
Every successful custom shower or tile floor installation relies on a clear, phased approach. We start by assessing the current conditions of your bathroom. Often, a bouncy floor under the tile or hidden structural rot requires attention before any new material goes down. Once the demo is complete, the focus shifts to substrate prep and waterproofing. Oleksiy personally executes every project, ensuring the wet-area tile is protected against moisture damage. After the prep phase, we move into layout planning, material selection confirmation, and the actual surface prep. Setting the tile requires careful alignment to avoid lippage and toe-stubbing tile edges. Finally, we seal and finish the grout. This phased approach ensures your Bathroom And Remodeling project remains organized, clean, and structurally sound from day one.
Step-by-Step Bathroom Tile Installation
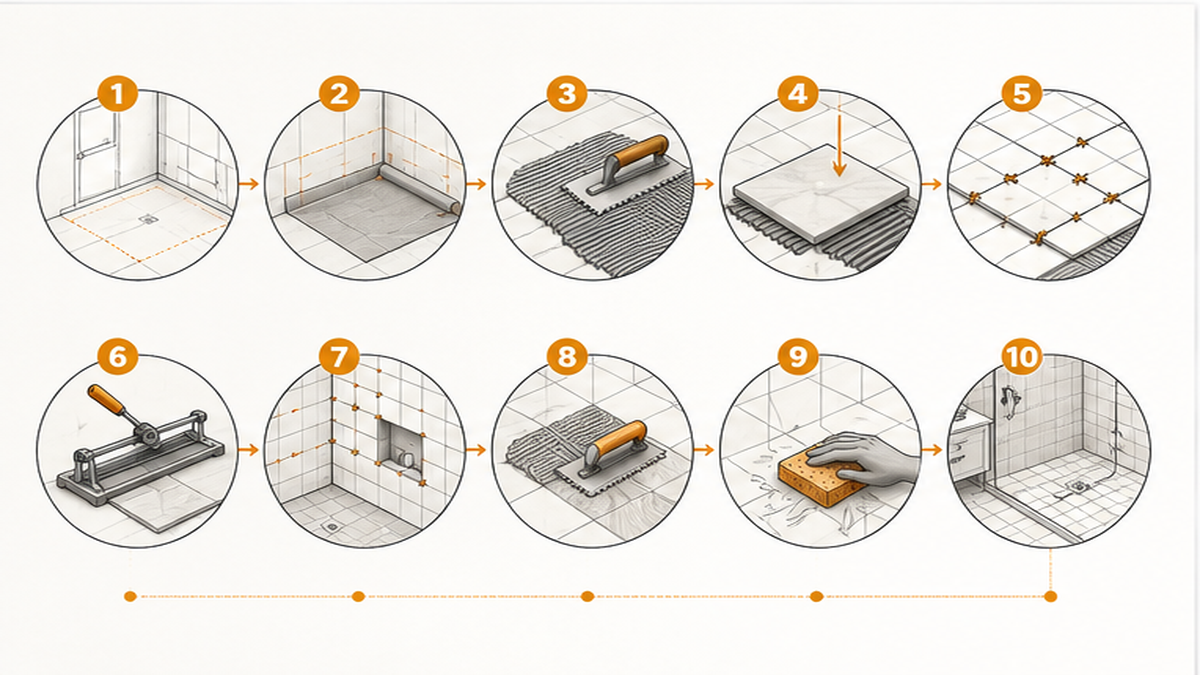
- Initial consultation and scope review: We visit your Franklin home to assess the space, measure the footprint, and check for signs of hidden water damage or uneven floors.
- Detailed written estimate: You receive a written scope of work detailing the demo, substrate prep, waterproofing methods, and material requirements for your specific bathroom.
- Professional installation: Oleksiy handles the demolition, installs custom shower pans, applies the waterproofing membrane, and sets the tile with precise grout joints.
- Final walkthrough and project sign-off: We clean the workspace thoroughly, review the alignment and finish with you, and ensure the new shower or floor meets our strict standards.
How to Prepare Your Home for Tile Work
Before we begin your Bathroom Remodel, a few simple preparation steps keep the project moving smoothly. First, clear the bathroom of all personal items, toiletries, and freestanding furniture. If we are working in a master bathroom, clearing a path from the exterior door to the work area helps us bring in backerboard, thin-set mortar, and tile safely. We protect your floors and contain the work area to control dust, but removing fragile items from adjacent hallways is always a smart move. Have your material selection finalized and on-site if you are supplying the tile. If you are still finalizing the look, reviewing Bathroom Design options early prevents delays once the demo starts.
Realistic Timelines for Bathroom Tiling
A common question is how long a custom bathroom remodel takes. The timeline depends heavily on the project size, layout complexity, and substrate condition discovered during demo. A standard tub surround might take three to five days, while a full custom shower with a mud pan and complex mosaic niches can take a week or more. Waterproofing membranes and thin-set mortar require specific curing times before we can apply grout. Rushing these steps compromises the integrity of the install. We communicate daily milestones so you know exactly what is happening and when the bathroom will be usable again. We start work as soon as materials arrive and stay on your project until it is finished.
Quality Checkpoints During Installation
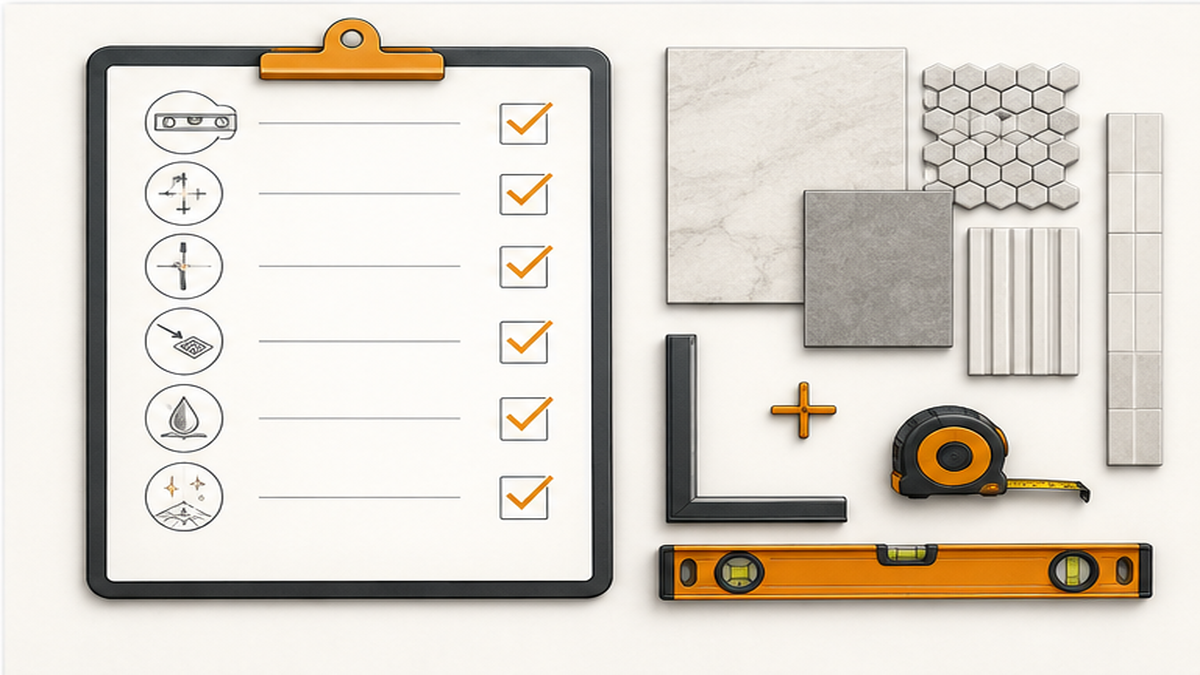
We do not just lay tile and hope for the best. Throughout the installation, we pause for specific quality checkpoints. First, we verify the substrate is flat and rigid; a flexing subfloor will crack grout lines later. Next, we flood-test custom shower pans to confirm the waterproofing holds before any tile is set. During the layout phase, we check for symmetry and plan cuts to avoid awkward slivers in highly visible corners. As we set the tile, we constantly check for lippage to ensure a perfectly flat surface. These checkpoints are why we maintain a 5-star Google rating with 50+ verified Google reviews in Williamson County.
What Can Delay a Tile Project?
Even with careful planning, certain factors can pause a tile installation. The most frequent delay occurs right after demolition. When we remove old tile, we sometimes find hidden structural rot, mold, or a compromised subfloor that must be repaired before new backerboard goes down. Material availability is another factor; custom or imported tiles can have long lead times, which is why we verify all materials are on hand before starting demo. Finally, mid-project changes to the layout or adding features like a recessed niche will adjust the timeline. We communicate any changes immediately so you are never left guessing.
When to Request a Tile Installation Estimate
You should request an on-site assessment as soon as you notice signs of failure in your current bathroom, such as a leaking shower, mold, or cracked tiles. It is also the right time to call if you are planning a Tile Floor Installation and have your room dimensions and inspiration photos ready. Because fixed online pricing is unreliable for custom tile work, we need to see the space to evaluate the substrate and discuss your material choices. Having your ideas gathered helps us provide a detailed, accurate written estimate that covers all necessary prep and waterproofing.
Common Questions About Bathroom Tile Installation
Can you put tile directly on drywall in a bathroom?
What are common mistakes to avoid when tiling a bathroom?
How do I request a bathroom remodel estimate?
Ready to Start Your Bathroom Remodel?
Notes on Tile Material Selection
Choosing the right tile impacts both the aesthetic and the installation process. Porcelain is highly durable and absorbs very little water, making it excellent for wet areas and bathroom floors. Natural stone requires specific sealing and maintenance. When you select your materials, consider the grout joint size; large-format tiles require a flatter substrate to avoid lippage. We can help you navigate these choices during our initial consultation to ensure your selection fits the space and performs well over time.